
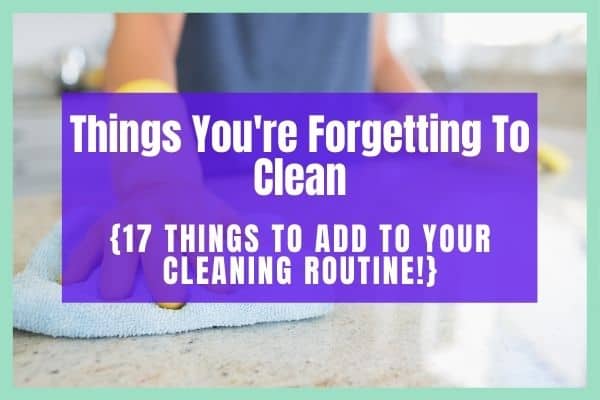
Forgotten Places to Clean
We have our cleaning routines, we know the big stuff that needs to be cleaned, but I’m sure there are at least a couple places you forget to clean in your home!
These aren’t just places you forget to dust, keep on reading for all 17 things people often forget to clean – and add them to your own routine for a super clean house!
This post contains affiliate links, which means I receive a commission when you make a purchase through one of these links. As an Amazon Associate I earn from qualifying purchases. For more information, check out my disclosure.
Things we forget to clean
1. Toothbrush Holder
The toothbrush holder can get pretty gross, and if you have one that’s more like a cup where the handles of the toothbrushes stay enclosed, you may never even notice!
When you’re done brushing your teeth and you toss the toothbrush back in the holder, it’s still wet and the water drips down until it’s dry. This accumulates at the bottom of the toothbrush holder, and if you’ve never looked here before, you might be a little grossed out.
Luckily, it’s an easy fix!
All you have to do is take apart the toothbrush holder (if possible) and run the icky areas under warm water and rub off the junk.
If you want to go a little extra with it, you can use a small amount of dish soap and use that while you scrub off the junk.
Rinse, dry, and add it to your cleaning routine!
2. Humidifier
The humidifier can get moldy inside, and when it’s in use that moldy water tank can even spread the mold and bacteria throughout the room (and house!). So it’s best to clean the humidifier pretty frequently.
I take a cotton swab and wipe it around the areas I can visibly see have mold on them. I also use a disinfecting wipe (my hand can fit in the tank enough to do this) and wipe around the inside of the tank. Then I let it sit for about 10 minutes and rinse it out.
Depending on how much you use your humidifier, you should really be cleaning it at least once a week. We mainly use them in the winter, so this is a seasonal, weekly task for us!
If you’re not using a humidifier, especially in dry months, you really should!
3. Ice Cube Trays
Our ice cube trays can absorb other smells in the freezer, so it’s not a bad idea to give them a quick wash with dish soap followed by a good rinse next time you empty them out!
4. Shower Curtain & Liner
If your shower curtain is machine washable, throw it in the wash 2-3 times a year to freshen it up!
You can also clean your shower curtain liner by using a scrub sponge and some dish soap (or even just water will work). Or just replace the shower curtain liner all together.

5. Pillows
Sometimes, when I tell people I clean or wash my pillows, I get met with some odd stares. People don’t often think to clean their pillows!
Think about it: we sweat overnight, our hair has natural oils in it, we have dead skin cells that come off overnight, etc. Yes, you probably wash your pillowcases, but it’s a good idea to clean the actual pillows, too!
First, check if your pillows are machine washable. If they are, this is super easy (and why I absolutely love machine washable pillows). To help them dry, you can put a couple tennis balls in the dryer with the pillows so they bounce around and help fluff the pillows up.
If your pillows are NOT machine washable, you may have to get them dry cleaned.
Another option for non-machine washable pillows would be to try sprinkling baking soda on them and letting it sit for a few hours. Baking soda is a natural deodorizer, and it will help soak up moisture. Afterward you can shake the baking soda off or might want to pound them outside.
Setting the pillows out in the sun (probably should lay a blanket out first, and make sure it’s a dry day!) can also help freshen them up.
Don’t forget to clean your throw pillows, decorative pillows, and their cases!
6. Mattresses
Cleaning and refreshing mattresses are similar to pillows in some aspects. The reasons for cleaning them are the same: the sweat, skin cells, natural oils we produce, etc.
You probably can’t toss your mattress into a washing machine (I mean, if you can, please let me know what mattress and washing machine you have, because #goals).
I use the baking soda option on our mattresses. It’s the same as above with the pillows, sprinkle baking soda on and let it sit for a few hours. Afterward, you can just vacuum it up!
You can also put some distilled white vinegar diluted with water in a spray bottle and mist it over the mattress as another way to deodorize it (I would do this separate from putting the baking soda on, as vinegar and baking soda can foam, and the last thing you want is some kind of vinegar paste on your mattress.
For the vinegar and water solution, I use 1 tablespoon of white vinegar per 16 ounces of water in a spray bottle. I use this as my all-purpose cleaner for everything around the house! Check out this cleaning supplies list post for more details on how I use this solution.
An important note about distilled white vinegar, is that many people use it as a disinfectant, BUT…it is NOT on the EPA’s list of registered disinfectants (which you can view here). While vinegar may have disinfecting properties, it’s best not to assume it has disinfected the way you’re expecting. That doesn’t make it any less of a deodorizer or all-purpose cleaner, though!
You can also use the sun method mentioned above for the mattress.
Related Post: The Only Deep Cleaning Supply List You Need
7. Vacuum Filter
You should really be cleaning your vacuum filter. Check your manual to see if it’ll give you an idea of how often you should be cleaning your specific vacuum filter.
You can also take into account how often you’re using the vacuum, and what kinds of things you’re cleaning up. For example, we have two dogs so I pick up a lot of dog hair and clean my filter pretty often.
If you don’t at least empty your filter, when it gets full you could just be spreading around the dust and dirt it has already picked up, defeating the whole purpose of vacuuming!
Always double check your manual, but I’m able to rinse my filter with water and give it a bit more of a cleaning, as long as it’s completely dry when I put it back in the vacuum. Because of this, I bought a second filter to easily switch them out!
If you’re in the market for a new vacuum, I’m going to give you a quick review of my FAVORITE vacuum I’ve ever owned. I used to hate vacuuming, especially stairs, but now it’s not nearly the pain in the butt it used to be.
This vacuum also comes with different attachments, and I seriously can’t talk enough about how convenient it is. I do plan to write up a complete review about it, but if you’re looking for a new vacuum, it’s worth every penny to have a cordless vacuum.
8. Trash Cans
Imagine all the stuff that goes into garbage cans that can be a breeding ground for germs and bacteria!
Give the inside and outside of your trash cans a wipe down with disinfectant, ideally every week for the rooms with the most traffic (like the kitchen and bathrooms).
9. Remotes
We touch our remotes often after a long day, running errands, being out and about. Can you imagine the germs on them?! Give them a quick wipe with a disinfectant every now and then!
10. Handrails
Use a gentle dish soap with some water, vinegar and water, or disinfectant to wash and disinfect your handrails!
11. Iron
Does your iron get built up stuff on it? Mine sure did. You know what really caused me to clean the iron? Here’s a quick little story.
I like to think I’m crafty, and I was making some DIY Christmas gifts which required me to print stuff on iron-on transfer paper. Then I was to iron the image onto a dish towel.
It was a pretty easy process once I got the hang of it. HOWEVER, I made quite a mess for myself.
I went in way too confident on my last one, wasn’t actually paying attention to what I was doing, and I placed the transfer paper wrong.
I put it ink-side up (instead of facing down on the material it was supposed to transfer to), and plopped my iron on top and pushed down HARD. I ended up with quite a mess on the iron and gave up on that final item.
Now, I know what you’re thinking, you’re wondering how I cleaned it up. Well, since I don’t iron clothes very much, I rarely use the iron unless I’m crafting. So, I wiped off what I could and decided it was Future Kristin’s problem.
I know, pretty despicable, but it was the holidays and I was getting exhausted and just wanted everything done.
THE POINT IS…I figured out how to clean the iron, and it uses my favorite cleaning product distilled white vinegar. It seriously is an all-purpose cleaner.
Stuff builds up on irons anyway over time. It’s just what happens as fibers in the fabrics you’re ironing react to heat. Check out this post for details, and I even share the before & after pics of my iron fiasco.
12. Doorknobs, Light Switches, and Cabinet / Closet Handles
Make sure to disinfect these every so often!
More Forgotten Places to Clean & Places You Forget to Dust
13. Blinds
There are some parts of the house that only the sun, in the exact right position, can really expose as dusty. One of those places for me are blinds.
Of course I see the blinds every day, I open and close them daily. But when the sun is shining just right, I cringe at the fact that I have forgotten to dust them in…how long? Who knows for sure, but it looks like months.
You can run a dryer sheet along the blinds when you dust, it will really help trap the dust. I’ve also heard rubbing dryer sheets on things like baseboards and blinds can help repel dust and pet hair in the future. While I don’t know that that’s true, the method does help with things smelling fresh.
You could also keep it easy and dust with a microfiber cloth.
To make your life easier, aim to dust the blinds once a month.
14. Baseboards
Similar to blinds, you can use a dryer sheet which supposedly helps repel dust from the baseboards.
I have done this, and the house smelled really fresh, but I haven’t noticed whether it repels more than a regular dusting with a microfiber cloth.
15. Under Beds
When was the last time you got down and vacuumed under the bed?
If you go take a look, I bet you’ll get a pretty good idea of how long it has been! Do a quick vacuum and you’re good to go!
16. The Tops of…..Everything! (Cabinets, ledges above doors, picture frames, trim around the house, etc.)
When is the last time you dusted the ledges above doors? Do your cabinets in the kitchen and bathroom have space above them before the ceiling? I promise you, there is plenty of dust on your cabinets!
Don’t forget to dust picture frames and the top of your refrigerator, too!
17. Plants
If you have any house plants, either real or artificial, you should keep an eye on them and (gently) dust them as well!
How to Have a Super Clean House
Adding this stuff to your cleaning routine will help you have the super clean house you’ve always wanted!
Also, doing these more frequently will only make it easier for you as time goes on because there will be less dust and whatnot built up in these places!
If you’re looking for a master cleaning list, and help finding a way to keep a routine, check out these printable cleaning schedule templates to finally create a routine that works for you!
Tell me in the comments which place you’ve been forgetting to clean! My biggest revelation was the toothbrush holder.
Things People Often Forget to Clean
Other Posts You Will Like:
The Only Deep Cleaning Supply List You Need
How to Save Money On Groceries